
|
www.riscos.com Technical Support: |
Having constructed a resource file you may wish to experiment with the interface to ensure that the proper links have been made between the different objects in the file. The resource file test application (ResTest) allows you to
Start ResTest in a similar way to other RISC OS applications, by double-clicking on its application icon. Then drag your resource file (or a selection of object templates from ResEd) to the ResTest iconbar icon.

ResTest will read the resource file and register it with the Toolbox. If your resource file contains any objects marked as auto-create they will be created automatically; any objects marked as auto-create and auto-show will be created and displayed. Thus certain objects in the resource file may appear immediately (e.g. iconbar icons). If these objects are linked to other objects, they will also be created, and these will be shown when you perform the appropriate action. For example, if an iconbar icon is linked to a menu, the menu will be shown when you press the Menu button on the icon. Then if the menu itself is linked to submenus, these will be shown when you traverse the submenu arrows.
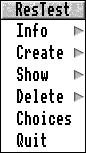
Once you have dragged your resource file to the ResTest icon then you can click Menu on the iconbar icon and the ResTest menu will be displayed.
Info displays an Info dialogue box.
Create displays all the object template names in the resource file. Choosing an entry calls Toolbox_CreateObject on that template and creates the object. Shared objects which have already been created are shaded to indicate that they cannot be created more than once.
Show displays all the objects that have been created from the object templates. If you go to this submenu immediately after dragging your resource file to ResTest, only two types of object will be displayed:
So, for example, if the only object marked auto-create was an iconbar icon object, then that object would be displayed, plus the menu object referenced by the iconbar icon object, plus any objects referenced by that menu object. Other objects are added to the Show list as you create them from the Create submenu.
Each entry shows the run-time generated object id and the name, or the object template from which it was created. For example:
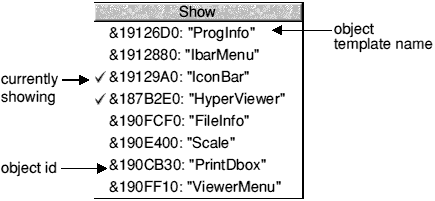
Entries which are currently showing are ticked. You can cause an unshown object to be shown by clicking Select on its entry, and cause a shown object to be unshown by unticking. Click with the Adjust button causes an object to be shown transiently, and the menu tree will not stay open.
Delete displays all the objects that have been created. You can call Toolbox_DeleteObject on an object by clicking on its entry. If the object has unshared children then they are deleted too (a shared object will only be deleted when all its uses are deleted - see Deleting an object).
Note: If you delete one or more objects created by a menu object (i.e. attached to the menu object), and then try and delete the menu object itself, you may see the following ResTest error displayed (you should not worry about this error):
Invalid Object Id (object id)
| object id | is the object id of the attached object that was deleted before the menu object was deleted |
So, in the example displayed of a Show menu (taken from the example application constructed in the Building an application), if the Scale object were deleted, and then ViewerMenu were deleted (ViewerMenu is the menu object that created the Scale object), then the above error message would be displayed and the object id would be that of the Scale object.
Choices displays the following dialogue box:
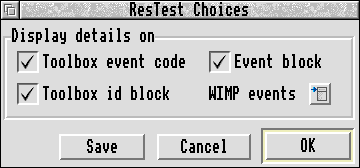
This box allows you to select what information is displayed in the event log window. The options are fully described in the following section The event log window.
Quit shuts down ResTest, removes all its windows from the screen, and deletes any objects that were created in that session.
If you click Select on the ResTest iconbar icon, the event log window is displayed. This window contains a log of the events received from the Toolbox. You can use this to verify that the proper assignment of events to user actions has been made.
The output in the log window displays four sets of information, depending on what options you have selected from the Choices box in the ResTest menu:
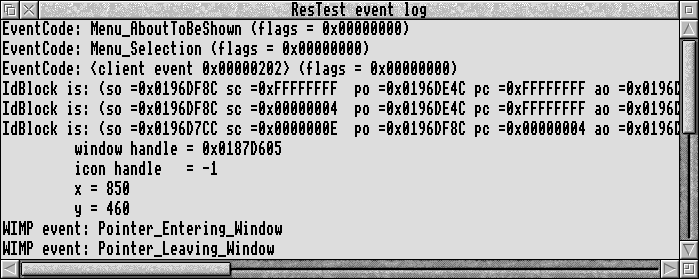
This displays the event code (including client-specified events) and the flags value of the event block. It is always preceded by 'EventCode:'

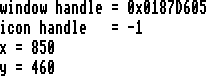
This displays the contents of the id block. It is always preceded by 'IdBlock:'

where
| so | = | self object |
| sc | = | self component |
| po | = | parent object |
| pc | = | parent component |
| ao | = | ancestor object |
| ac | = | ancestor component |
Once an event has occurred (e.g. DragEnded), information about that event is returned in the event block. This information is always displayed indented by eight spaces (how much information is displayed depends on the event):
This option allows you to select various types of Wimp events from the attached pop-up menu. The information displayed is always preceded by 'WIMP event:'.
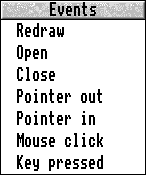
The following example shows the Wimp events reported when Pointer in and Pointer out have been selected from the pop-up menu:


If you click Menu in the log window the ResTest menu is displayed.
Save leads to a Save as dialogue allowing you to save the text in the log window to a file.